Thursday, December 31, 2020

Flannel - Fuzzy Love!

I have seen a lot of posts and questions lately about using cotton flannel in quilting – and I used some, myself!

So here are some observations that I have about flannel that you may find helpful.

Cotton flannel is notoriously a low thread count fabric.  Not a high thread count like quality woven cottons that we use for quilting.  Which is why it is NOT recommended for face masks. 

Even the good quality flannels sold at your local quilt shop have a lower count fabric than woven cottons.  Flannels purchased at a discount store are often VERY loosely woven.


Flannel also sheds a lot of fiber/fuzz in the process of using it.  So, it needs special attention when used in a quilt.  The process of making flannel, and making it soft and fuzzy, brushes the fibers to bring up the nap.  So that works both for you and against you.

Prewashing

Cotton flannel shrinks more than high quality woven cottons.  So, it is really important to prewash flannel AND it is a good idea to wash and dry it twice!  Flannel keeps shrinking past the first wash.  It is the hot water/air and the agitation of the washer and the dryer that causes the shrinking.  You want to do as much shrinking (and get rid of any escaping color) before it goes in your quilt.

And guess what?  That means you need to buy a little MORE flannel than you would quilting cotton for the same application.  You’re going to lose some inches in the shrinking process.

Some people recommend a lingerie bag, but I think that severely limits the agitation of the fabric and in this case agitation is good.  Think about fulling wool fabric and the benefits of the agitation in that process.

When you put flannel on the back of a quilt and woven cottons on the front, flannel shrinks more than woven cottons so the back can end up smaller than the front.

Likewise, when you combine flannel and woven cotton pieces on the top of the quilt, flannel will shrink more than the woven cottons and leave your quilt top design askew.

It’s best, if you want to use flannel on the top, to use ALL flannel on the top so it will all shrink at the same rate at the same time, each time it’s washed.

That said, if you want to combine both types of fabric, just be aware of how it will behave after a few washings/dryings.  Most people use patterns with larger pieces when sewing with flannel, just to avoid struggling with tiny, loosely woven pieces and risking the shrinkage distortion. 

Stretchy

The looser weave/lower thread count of flannel will make it much stretchier than woven quilting cottons.  When you press it prior to cutting, take care not to distort the yardage or the individual pieces.  Move your iron up and down as we are taught, rather than scrubbing from side to side.

Should you starch or stabilize with a spray?  Maybe.  It might give you better results, especially if your pieces are getting small.  Try it.  If your flannel is nappy on only one side (as the lower grade flannels are), starch or apply a spray stabilizer from the back.

Seam Allowance

Plan to use a 3/8 or ½ inch seam allowance when piecing with flannel.  The looser weave can cause edges to fray more readily.

If you’re used to making garments with flannel, like pajama bottoms, you’re using a 5/8-inch seam allowance and you don’t notice the fragility much.  And you are likely serging or zig zagging the seam allowance.  But in quilting, the seam allowance stands alone and the loose weave of flannel needs a deeper seam.

Should you press seams open?  I am not a fan of open seams, unless you are bringing a number of seam allowances together in a point – which you are unlikely to do with flannel. 

Press to the side – here’s why:  Any tension placed on the completed quilt, like someone sitting on it on a bed, for example, will put tension on the seams.  If you have pressed them open, the seam can gap and the batting will show through.  With a loose weave like flannel, that damage can be permanent.  If you press the seam allowances to the side, any tension on the seam from above will still cause a little gap but only the fabric in the seam allowance will show through.  And it will be a lot more stable.   

Stitch Length for Piecing

If you make a piecing error, it’s going to be very difficult to pick out the stitches in flannel.  Try it some time.  A longer stitch length could work better for you.  If I’m using larger pieces of anything I usually bump up my stitch length to a 3.0, anyway.   But a longer stitch length also bumps up the risk of fraying.  You make the decision based on the quality of the flannel you’re using.  [And that extra length you bought might save the day if you need to cut a new piece…]

Keep your machine clean

Flannel sheds a lot of fuzz!  Plan to clean the bobbin area in your machine more often than you normally do.  If you can clean it every time you change a bobbin – or at least check that area and give it a quick wipe or vacuum, you’ll have better results.  A clogged bobbin case often leads to broken threads on the top and other wild stitches.

Thread

Using cotton thread for piecing or quilting should be just fine.  If you use polyester, I would stick with a good quality filament poly.   My opinion is that the tri-lobal polys are such a hard, sharp thread, that they could damage the softer flannel fibers. We will see if I am right in 10-15 years when we look at these flannels that are quilted with tri-lobal poly.

Needle

Some people find that they have better results sewing on flannel if they use a new needle.  I always piece and quilt with topstitch needles and change them often.  I like the extra sharpness and the bigger eye. 

Binding

Should you bind with flannel?  I wouldn’t.  Did you know that the binding on a quilt is the part that gets the most wear?  True.  That is why we bind with a double layer of good quality woven cotton.  Back in the day…we used to use a single layer for binding.  In the 1980’s the “French Fold” binding technique became popular; so popular, in fact, that no one even calls it that any more.  We just do it.  So the looser weave of the flannel defeats the purpose of having a durable binding.  Stick with high thread count woven cotton.

Try it!

These are the Threadmonger’s tips for quilting with flannel!  I used it recently for the back of a lap quilt for a wheelchair user.  The flannel on the back keeps the quilt in place more readily because of the grippy nature of the flannel’s nap.   I also used it to line a hand-warming pocket on the lap quilt.  I tested it and found it quite comfy!  There are lots of cute flannel prints available for you to play with and with these tips you’ll be feeling the fuzzy love!

Tuesday, September 8, 2020

QUILT LABEL CONTENT - IDEAS FOR YOU


QUILT LABEL CONTENT

There are thousands of web pages on how to create quilt labels but I want to discuss the content for a few minutes.

Way back in 1976, the American Bicentennial is really what regenerated our interest in quilting.  In fact, all traditional crafts and cooking methods got a boost.

At the time, every state put together a “quilt documentation project”.  Quilt historians and volunteers from all over each state got together and invited the public to bring antique or vintage quilts to be documented, photographed, and identified.  Most teams published books from their efforts.  The objective was to record the quilts typical of a state during the country’s history.  Patterns for the quilts could most often be recognized from published works.  Of course, there were a lot of variations. 

Most of the quilts had no real written record of who made them and where.  So the families owning the quilts did their best to bring anecdotal information about the quilt and the maker.  On the occasions where the quilt had been labeled, the documentation teams were THRILLED!  It was so much easier to identify a pattern, a trend, or a prolific quiltmaker with the label information.

From that documentation effort three basic needs emerged.  So these are the three MOST IMPORTANT things that you can put on a quilt label:

1.  Maker’s name.  Include the maiden name if necessary.  And in this modern time where we shop out many quilts to professional longarmers, add their name, too.

2.  Year the quilt was made.  By “made” we usually mean “finished”.  If the quilt took 10 years to make it is lovely to include that information. 

3.  The state in which the quilt was made. 


Any additional information on your label is delightful to have.  Who was the quilt made for?  Occasion?  What is the relationship between the giver and the receiver?  Pattern used?  City where the maker lived?  There are some real opportunities for you to give future quilt historians what they crave.

Finally, I like to add some “data” for myself.  Dimensions of the quilt, batting type, thread used, name of pattern, name of quilt, source of pattern, etc.  Mostly so I can remember but I think all information is welcome to a researcher somewhere in the future.

Quilt historians are as eager for hard, verifiable data as genealogists are!  So give them the best information about your quilt and feed their craving!  A quilt is, after all, a part of your personal legacy to the world.  Be as generous with your information as you are with your quilts.


Sunday, April 19, 2020

Quilter's Entropy

When you get out a lot of quilting supplies for specific projects, and somehow the different elements drift off into other projects and spaces, and then you can't do the original project...

That's Quilter's Entropy.


I have it.  During this "all stop" and stay home order due to the pandemic, I thought, "I'll get out some projects that I have put together the ingredients for and do them."  HA!  Pieces of fabric, templates, fusible interfacing, stabilizer, thread, and patterns have all migrated out of those project boxes and into other realms. 

So, instead, I am making pleated face masks as fast as my stash will let me and administrating the distribution of masks in my community.  We have about 40 quilters making them and joyfully getting scraps and chunks of "Wonder Fabric" used up!  Our first few visits to the local quilt shops will be to replenish our stash and to reward ourselves for work well done. 

I hope everyone reading this is safe and well.  Quilters are important!


Monday, August 12, 2019

Skagit County Fair 2019!

I was on vacation during the Skagit County Fair this year, so my friend (and excellent quilter) Dianne Lowe entered my pieces and delivered them back to me!

I entered:

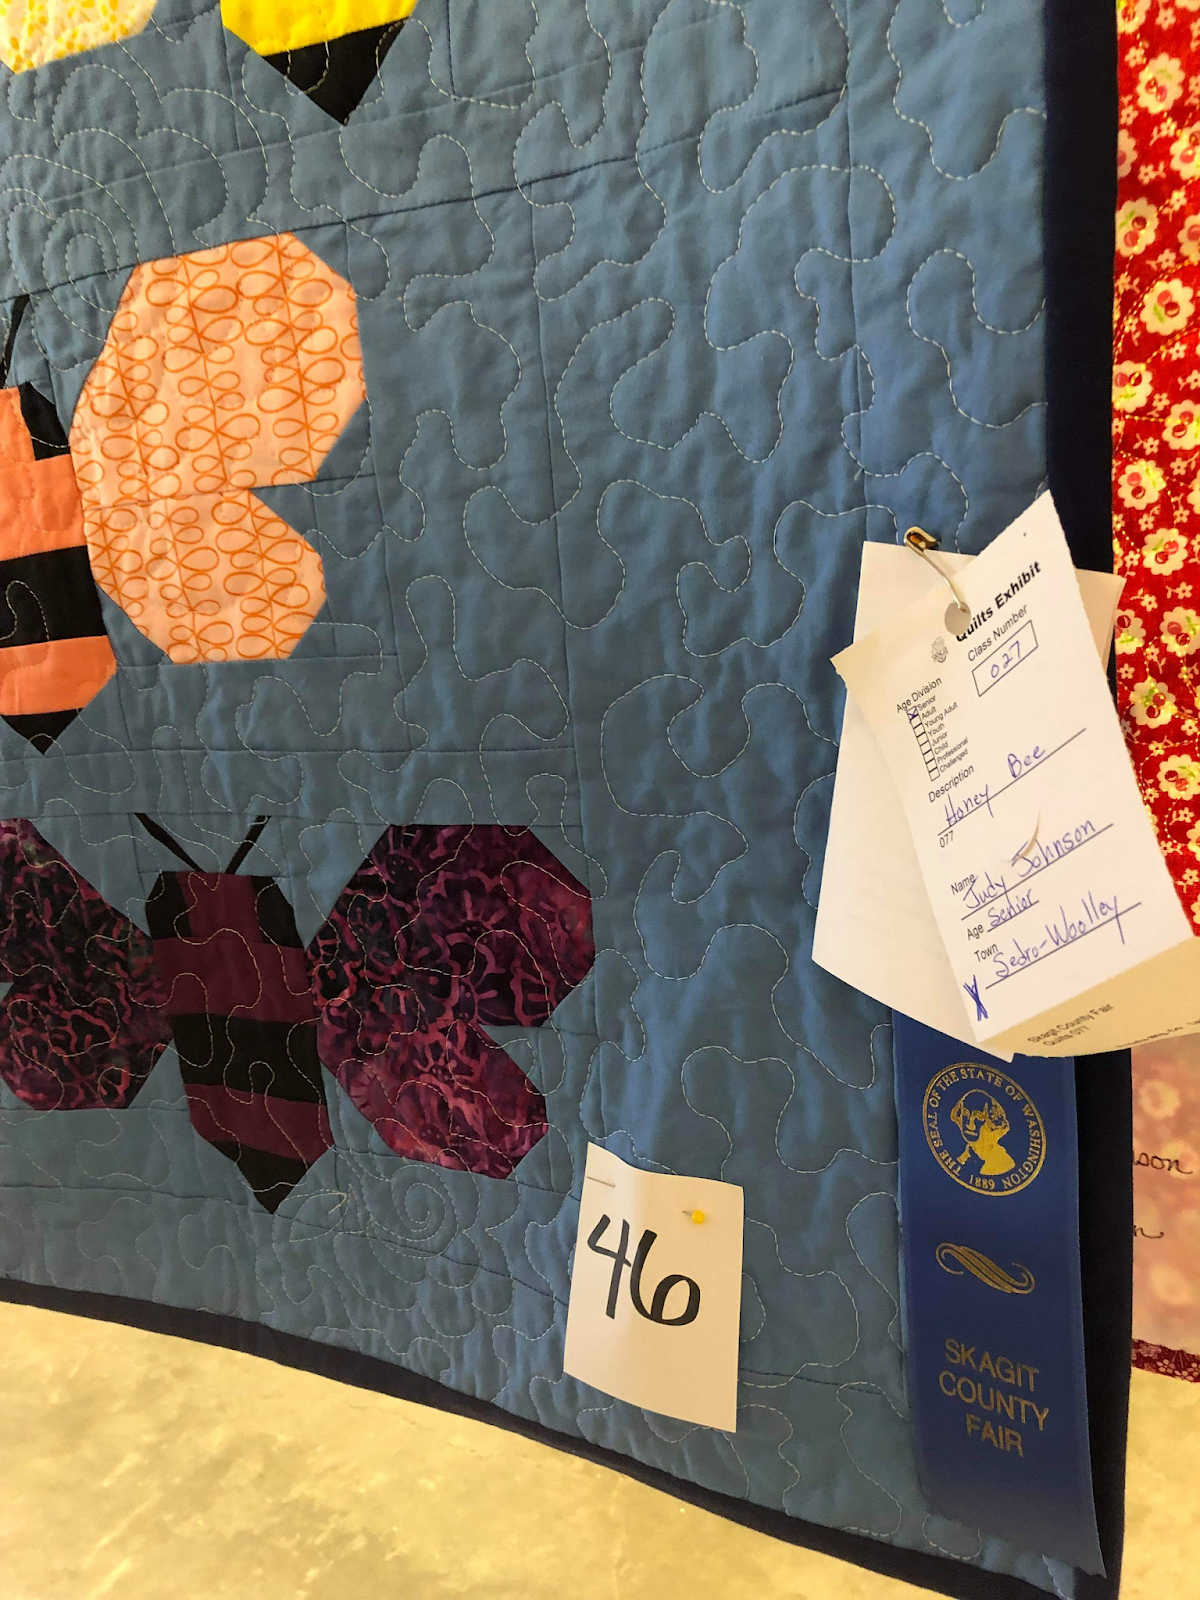
"Skagit Valley Honeybees" from a pattern by Elizabeth Hartman.  I used a blue-gray background fabric to represent the perennial gray skies of the Skagit Valley!  We have an active beekeeper's association group and I appreciate all they do to keep bees safe and buzzing.  Blue ribbon.


"Scrap Basket Cats" from a pattern by Kathy Love.  This was a UFO for me and I am so glad I completed it this year!  The original pattern uses four kitties - I wanted nine!  Red ribbon. But no photo of the ribbon...

Here's a secret:  I inked in the eyes and nose with a fabric marker.  No satin stitch for me!


"Christmas Angel Table Runner" from a pattern by Letitia Hutchings.  I had some Russian reproduction fabric that I had been hoarding, and got it out for this special runner.  It is always fun to use different threads for the different sections.  Table runners are a great place to experiment with threads!  Blue ribbon and Best of Class.

Oops, forgot to take a photo of the whole runner with the binding on...


Enter quilts in your local fair!  It's fun and you get good feedback from the judge.  And volunteer to help for a few hours or a day.  It's a great experience.  I usually do it but this year I was out of the country...

And THANKS to my friend, David Bricka, for the photos of the ribbons. 


Saturday, February 10, 2018

Quick tip - winding a bobbin!

Here is a quick tip for you - and anyone you are mentoring into being a quilter!

Don't overfill your bobbin.

Be sure that the bobbin thread, when wound, is well within the edges of the bobbin itself.  Not bulging out or stacked so full that the thread goes beyond the bobbin edge at any point. 

Your bobbin needs to spin freely within the bobbin case.  And some sensors may trip a warning if they see too much thread.

Wind your bobbin snugly - I run the thread, while loading, between my thumb and forefinger to make sure it has even tension and is loading the bobbin evenly.  I know that sounds a little compulsive, but it works really well.  And if the bobbin thread pops off the guides I am already holding it so it doesn't wrap around the spindle.

You probably can't get as much thread on the bobbin as they do at a factory that loads prewound bobbins.  Don't worry about that and don't go for the record...

Bobbin winding is a little Zen moment during the quilting process that reminds you to slow down and enjoy the meeting of needle, thread, fabric, and your own creativity.  Be mindful and have fun!

Wednesday, January 17, 2018

Who are your quilting mentors? I know mine!


I have been quilting for 40+ years.  I started as a self-taught, book-learned quilter in 1976 during the Bicentennial when historical crafts became the rage.  I muddled through my first few quilts, then took a few classes, and was swept up in the possibilities of quilting!

I have taken some great classes and learned from some great quilters.  So I was musing, at a four-day retreat this weekend, who has influenced my quilting life the most?

Indirectly, Jinny Beyer
I took my first formal classes from a quilt shop owner who had studied with Jinny Beyer.  Sadly, I have forgotten her last name, but her first name was Kathy and she owned a shop in Everett, Washington.  She taught us so well that I still use the techniques in every quilt!  This was before the rotary cutter revolution, and we learned to make and cut templates (with scissors) and to be accurate.  We hand-pieced, machine-pieced, hand quilted, hand-appliqued, machine-appliqued, used traditional blocks, and designed our own.  This was in my “hunter green and coral” period and the first quilt I completed in her class is still part of my collection.  Thanks, Kathy and thanks, Jinny, for starting my quilting journey!

 
I'd like to point out that this is hand-pieced and hand quilted!


Karen Kay Buckley
I took a class from Karen Kay Buckley in Ripley, West Virginia in the 1990’s and she taught me the basics of machine quilting on a domestic machine.  I do a LOT of free-motion quilting on my Elna and she might be pleased to know that she is partly responsible for MANY quilts for Project Linus.  I love to FMQ simple designs; it’s mesmerizing.  I have not taken the time to become an expert with custom designs.  I love the meander look and I don’t get too far from it.  Maybe a few pebbles, some flowers, tendrils, and leaves.  I made a bunch of pillows for kids a couple of years ago and quilted their names into the corners of the pillows for a subtle touch. 

Sarah Porreca
Sarah was a local quilting teacher in the Durham area of North Carolina.  I took classes from her in the 1990’s and a miracle happened – I learned to make a SQUARE log cabin block!  She also taught me to miter the corners of my binding, to crazy quilt, and to be fearless!  Sarah said, “If you make a mistake on a quilt or accidentally cut a hole in the top, applique a heart over it and the recipient will think you’re a genius.”  She was right! 

Sharyn Craig
Oh, my goodness, I learned a lot from Sharyn Craig about quilting efficiency!!  She surely is the original queen of chain piecing.  She had us slicing and dicing and preparing our pieces and units.  In piecing order on the left side of the machine and stacked for action!  And she came around to coach us and make sure we were set up for success!  I have used her techniques ever since and I have become a prolific quilter (ask my friends…).  When I sit down to sew I can put nose to the needle and go like the wind!!  She also taught me the value of pressing the seams “as they are sewn” first, before opening the seam to press again.  What a big difference in the crispness of my blocks! 

Quilters Newsletter Magazine
I was an early subscriber and thrilled that there was a magazine just for me!  With real news about the quilting world plus patterns and GREAT ADVICE!  I still go back and look at old issues – now that the magazine has ceased publication the old issues are like gold.  More than anything I think QNM taught me that I can make every quilt my own, whether using a traditional design or a modern twist.  Thanks to the editors and contributors to this magazine for the leverage they provided all of us into quilting for the love of it.

My Aunt Dollie
She taught me to thread a needle and embroider and do crewel work when I was just a tad.  Every time I thread a Chenille needle with pearl cotton I think of her.  She used to take care of me when my regular babysitter was unavailable or I was sick.  She had a cat named Kilroy.  We spent many hours with needle in hand and she was so patient and comforting. 

My high school boyfriend’s mother
My own mother hated sewing.  Clara opened the sewing world for me – taught me to make clothes, use the features on my machine, and most of all to embrace creativity!  She was one of those people who could take down the drapes and make a ball gown.  Without a pattern.  And it would be beautiful.  I was sewing in a vacuum until she mentored me; without her I would not be a quilter. 
 

Yes, I have taken a lot of classes from a lot of quilting teachers over the years and learned something from every one.  But I think of these people when I am using basic techniques and being thankful that I know how the machine works, how important accuracy is, and how to enjoy the process. 

Who were your quilting mentors?  Drop them a note of appreciation.  It is too late for me to thank everyone who has guided my quilting journey but I remember their good advice and will pass along the techniques to young quilters.  It’s a form of quilting immortality.


Thursday, November 30, 2017

Sunbonnet Mew! A friendship block quilt for 2017

Well, we didn't hold it up very straight...but here is my finished quilt, "Sunbonnet Mew"!


These are friendship blocks from one of my favorite quilting groups - Quilters by the River in Sedro-Woolley Washington.

Blocks were made from my directions and spec by each participating member.  I did the machine applique of the kitties, assembled the top, and quilted it on my Elna (domestic machine).  It really is square...

It is about 70" x 70".

The pattern is from the VERY popular book, "The Cat's Meow" by Janet Kime (Martingale Publishing).  This book was reprinted for its 10th anniversary so there are a lot of copies out there.  I have made more quilts from this book than any other I own!   The name of the pattern in the book is "Puss in Bonnets" but I couldn't resist calling mine "Sunbonnet Mew". 

Thread used for the machine applique was Invisafil 100 weight poly, DecoBob 80 weight poly, and YLI 100 weight black silk.  Bonnet detail was added with various 12-weight threads (yes, by machine). 

Quilted with Konfetti by Wonderfil, a 50 weight cotton in white.

I love this so much.  It will remind me of the happy days spent with my quilting friends.  If you have an opportunity to participate in a friendship block exchange with your guild or group, do it!  Be very specific about what you want in your blocks and create a special keepsake of your very own!